Beer, basil & bread

Beer, basil & bread…sounds like some kind of heaven to me.

So when I was making a dinner menu for the other night I decided that I really wanted to bake some bread to pair with the pork tenderloin I was craving. A recipe I had used a long time ago popped into my mind and then it was a matter of finding it…Basil Beer Bread. It’s from an issue of Real Simple in 2006! What’s great about this recipe is that you don’t have to think too far ahead because the stuff doesn’t have to rise.

Ingredients

Olive oil for the baking sheet
3 1/4 cups all-purpose flour
1 1/4-ounce package active dry yeast
1 1/2 teaspoons kosher salt
1/2 teaspoon black pepper
3/4 cup (3 ounces) grated Parmesan — I used Manchego
1 12-ounce bottle beer, preferably ale — ok, total side note, somebody brought non alcoholic beer to a party at my place once. It’s been sitting around for awhile. Finally got to get rid of some of it here!
flour for the work surface
1 cup chopped or torn fresh basil

IMG_8308

Directions

Heat oven to 400° F. Oil a baking sheet. In the bowl of a standing mixer on low, or in a large bowl using a spoon, combine the flour, yeast, salt, pepper, and Parmesan.

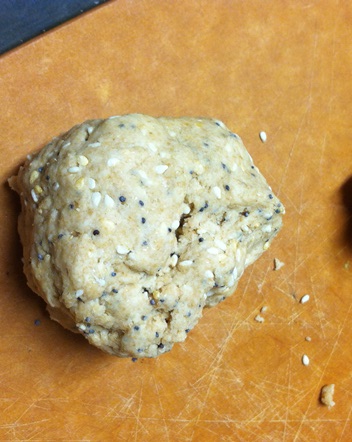
Add the beer and mix just until the dough comes together. Turn the dough onto a lightly floured surface. Sprinkle with the basil and knead gently just until incorporated. Shape the dough into a round loaf and transfer to the prepared sheet.
Bake until the loaf is lightly browned and a toothpick inserted in the center comes out clean, 40 to 45 minutes. Turn the loaf onto a wire rack. Let cool for at least 10 minutes before slicing.

The loaf is heavy! Definitely not light and fluffy but totally delicious! Paired perfectly with the tenderloin and roasted Brussels sprouts.

IMG_8313

Ginger Cubed/Power of 3 Biscotti

Technology is great…but sometimes you can’t type the proper stuff.  The title of the blog should read Ginger3 Biscotti.  Ok, I feel so relieved now this is coming across better!  This biscotti has three types of ginger is why that 3 is so important.  Anyway…biscotti is one of my favorite things to bake because it can be made with no dairy, so those of us who are lactose intolerant/lactards can enjoy it!  I hadn’t made this ‘flavor’ recently so had to break it out.

Ingredients:

2 cups flour
1 cup sugar
¾ teaspoon ground ginger
½ teaspoon baking powder
½ teaspoon baking soda
½ teaspoon salt
1 large egg
1 teaspoon vanilla extract
1 tbsp fresh ginger, peeled and finely grated (I have found some great stuff jarred stuff at the Asian market that is handy to just have on hand)
1/3 cup crystallized ginger, chopped (Trader’s Joes or Whole Foods bulk)
1 cup pecans, chopped

IMG_4764[1]

Directions:

-Preheat the oven to 375. Blend the flour, sugar, ground ginger, baking powder, baking soda, and salt briefly with an electric mixer (I love my KitchenAid).

-Blend in the egg, vanilla, fresh and crystallized ginger. Finally add the nuts, and might need some water, too. Blend until dough is good texture to put into logs.

-Grease a large baking sheet (oh silpat, I love you). Divide the dough in half and roll each half into a log. Transfer the logs to the baking sheet, leaving space between the logs.

-Bake until the logs are firm to the touch, about 30 minutes. Remove the baking sheet from the oven and reduce the temperature to 325. Wearing an oven mitt to hold the logs in place, use a serrated knife (pizza cutters actually work a heck of a lot better) to cut them crosswise on the diagonal into 1/2-3/4″ thick cookies.

-Lay the cookies on one side and return the baking sheet to the oven. Bake until the biscotti are crisp, 5 to 10 minutes. Cool the biscotti on racks and store in an airtight container.

**at this point I actually just turn the oven off and let them stay in the oven until I’m ready to eat them.  I also put them on a rack on the cookie sheet so they get the heat on both sides during the second bake.

IMG_4776[1]

I have been making these for years and love them.  Can never go wrong with biscotti, from dunking them in coffee to wine to just munching on them for snacks.

From Quinoa to Cookie

I make birthday cookies for my friends and for a recent one I emailed her with an idea because of dietary concerns.  I know she’s big into quinoa and I looked for (cookie) recipes with quinoa in them.  She was kind enough to send me a link to the cookie (recipe) she would like for her birthday goodies.  They where basically simple chocolate chip cookies, but with a coconut kick.

As I investigated the recipe, it of course called for quinoa flour.  I went to Whole Foods and they had it (I was just talking to them about it, didn’t actually see it but could only fathom the price — just googled it $10-$13).  But then I thought, there has to be a way to make this stuff.  Of course!  This makes it much more fun, and beyond less expensive.  You pay $3-$4 for the quinoa and you’re set.

So, found a great recipe for it on Homemadeadventure. You just take 2 cups of quinoa and put it in a skillet over medium heat.

IMG_0401

Toast it for about 5 minutes, stirring occasionally.

IMG_0403

The quinoa will start to make a light popping sound, kind of like popcorn, when the toasting starts. You want this sound for about a minute or two.  Then it gets nice and brown.

IMG_0408

Let it cool then put it in a food processor.

IMG_0410Blend until fine.  I did mine for probably about 8-10 minutes.

IMG_0411

IMG_0412Then baking started!

The recipe was from Ambitious Kitchen and named The BEST Gluten Free Chocolate Chip Cookies

Ingredients

  • 2 cups quinoa flour (homemade or store bought)
  • 1 teaspoon baking soda
  • 1/4 teaspoon salt
  • 2/3 cup coconut oil, melted and cooled (Trader Joe’s has great stuff)
  • 1 1/4 cups dark brown sugar
  • 1 egg
  • 1 egg yolk
  • 2 teaspoons vanilla
  • 1 cup chocolate chips
  • coarse sea salt, for sprinkling

IMG_0419

Directions

Preheat oven to 350 degrees F.  In large bowl whisk together quinoa flour, baking soda, and salt; set aside. (I always tend to just put this on top of the wet mixture later).

In bowl of an electric mixer beat together melted coconut oil and brown sugar until smooth. Add in egg, egg yolk, and vanilla; beat again for 2 minutes or until smooth and creamy.

IMG_0421

Add in flour; and mix on low speed until just combined. Slowly add in chocolate chips.

IMG_0424

IMG_0428

Roll dough into 2″ balls and place on cookie sheet leaving 2″ apart. Love the Silpat mat!  It didn’t say whether you would spray the cookie sheet or not so glad I have it.  Bake 8-11 minutes or until edges just being to turn a golden brown.  If you noticed that your cookies are baking flat, then you may want to chill your dough for 10-20 minutes.

IMG_0430

Remove from oven and let cool at least 5 minutes on baking sheet. The cookies will need to set and will be very fragile at first so you have to be a little patient for the edges to harden a bit before removing them. Once the edges and bottom harden a bit, transfer to wire rack to finish cooling. Makes 18-20 cookies.  I got about 2 dozen out of this recipe!


IMG_0432

IMG_0434

My friend loved the cookies and not sure how many are left.  Very coconut-y and the great chocolate in there.

1oz…unwrap or snap?

*I will forewarn that I am leaning towards one side on my comments in this post.

I have baked a good amount of times that I have frequently reached for unsweetened chocolate.  The convenient, perfectly measured, individually wrapped pieces of goodness that are added with a variety of ingredients for a delicious end product.  I was making some brownies last night and had to pick up some of the chocolate.  I open it up and am taken aback.  I don’t get a 1 oz. piece.  I get a bar.

IMG_0307

I flip the box over to be sure I purchased the right thing.  Yes, I did.  But they are advertising this great new phenom!  4 oz Easy Break Bar.

IMG_0306

IMG_0310

Grrr…I wanted my 1 oz wrapped piece(s) of chocolate so I didn’t have to break anything/put forth any more labor.  And, easy break is not the word.  I could not snap it easily.  I had to get the knife out.  I needed 2 oz for the recipe and the first cut barely made it along the line.  On the second, most of the bar split.  *Again, can you tell my bias.*

So, as nice as changes are and innovation is, sometimes sticking to the old stuff is good.  I rest my case.  Would love to hear your thoughts if you’ve used the new ‘cut’ of the product.

Bake on, bake on.

Chocolate Toffee Cookies

I have a cookie recipe in my recipe binders that I’ve relied upon for years.  I never really get to enjoy the goods because of the butter in them but when people try them I hear rave, amazing, sometimes censor-needing (in a good way) reviews.  It’s Epicurious’ Chocolate Toffee Cookies recipe.  An amazing combo of chocolate, Heath bar…and dark rum.

Ingredients:

1/2 cup (1 stick) unsalted butter, room temperature
1 cup plus 2 tablespoons sugar
1 large egg
1 tablespoon dark rum — I always throw a bit more in there
1 teaspoon vanilla extract
1 cup all purpose flour
1/2 cup unsweetened cocoa
1/2 teaspoon baking soda
1/4 teaspoon salt
1 1/2 cups crushed chocolate-covered English toffee (such as Heath bar; about 7 ounces)
1/2 cup chopped almonds

IMG_0033

Directions:

Preheat oven to 350°F. Beat butter and sugar in large bowl until fluffy.

IMG_0035

Add egg, rum and vanilla and beat until well blended.

IMG_0041

Sift (or in my case I just add/drop in) flour, cocoa, baking soda and salt into small bowl. (and then mix in with the power of KitchenAid) Stir dry ingredients into butter mixture.

IMG_0043

Mix in toffee and chopped almonds. (Ditto on the last KitchenAid statement — that’s what it’s there for!)

IMG_0049

Drop batter by heaping tablespoonfuls onto heavy large ungreased baking sheet (I still use Silpat mats), spacing 2 inches apart.

IMG_0052

Bake until cookies puff slightly and crack on top but are still soft to touch, about 11 minutes. Let cookies cool on sheet 1 minute. Transfer cookies to rack and cool completely (cookies will become crisp).  And then heavenly bliss arrives.

IMG_0061

Repeat shaping and baking with remaining batter. (Can be prepared 2 days ahead. Store in airtight container at room temperature.)


Paleo Brownie Bliss

I make birthday cookies for all my friends.  The friend on the roster last week is gluten intolerant and lactose intolerant, so it always makes it even more fun to bake something using gluten-free flour, xantham gum and/or other random goodies and no butter, milk, etc.  Well she told me she’s on the Paleo diet now and asked if I could make something based on that and mentioned there are good brownie recipes out there.  To the search engines I go…what I ended up deciding on were some Paleo Brownie Bites (aka bliss, heaven, death by chocolate), which I found from a great food blog, The Lucky Penny Blog.  They don’t require baking, have no crazy ingredients.  The only thing you need is to think a little bit ahead (for refrigeration).  And based on my tastes and the folks I knew they were going to, I made very few changes.

Ingredients:

2/3 cup raw walnut halves and pieces
1/3 cup unsweetened cocoa powder
1 heaping cup soft medjool dates, pitted (about 17 – 20 medium sized dates — I bought the small tub at Safeway)
1 tablespoon vanilla extract
1 to 2 tablespoons coconut milk OR any liquid sweetener, like honey, agave, or maple syrup if you want your brownie bites to be sweeter — I used Maple Agave Syrup from Trader Joe’s
2/3 cups shredded unsweetened coconut to roll them in (I’m not a fan of coconut so I rolled half of them in crushed walnuts, the others half I left plain)

IMG_2743

Directions:

Place pitted dates in a bowl of warm water for a minute to soften

IMG_2751

Add unsweetened cocoa powder and walnuts to food processor, blend until walnuts become fine crumbs.

IMG_2754

Drain dates and place in the food processor with the cocoa walnut crumbs. Add vanilla. Process until mixture starts to combine. It may not fully combine until liquid is added. Add coconut milk or liquid sweetener (if desired) half a tablespoon at a time. Pulse. You will know the consistency is right when the dough combines into a ball in the middle of the food processor.  If dough is too runny add a tablespoon or more cocoa powder to bring it back to a dough like state.

IMG_2756


IMG_2759

Transfer dough to a bowl and cover with plastic wrap. Refrigerate for at least 2 hours. I cooled mine overnight, you could also freeze it for faster results.

Once dough is cold, put coconut crumbs (or in my case, walnut crumbs) from earlier into a shallow bowl. I used the great Pampered Chef Chopper to get them nice and finely chopped.
IMG_2763
Scoop heaping tablespoons of dough and roll them between hands to form balls. Roll balls in crumbs, pressing the crumbs gently into the ball. Continue until all dough is gone. You can moisten your hands with water if the dough begins to stick to your palms as you roll.

IMG_2764


IMG_2766

I made some smaller balls and bigger ones.  When done, kept them in the fridge.  Took them to my friend the next night for the party.  They were a huge hit!  Amazing!!  None left.  I might add a bit of flavor kick next time with a little spiced rum (as long as Paleo followers don’t mind) or hint of cinnamon.  But, I am so glad my friend requested something like this because it was an awesome recipe for me to find.  I also love that this recipe has no dairy in it so those who are lactose intolerant can easily enjoy some brownies.  Heaven, bliss, chocolate.

Dip & Sip

I have a passion for baking and whipped up some Cappuccino Chocolate Chip biscotti last week.  My friend and I finished dinner and we needed dessert so I went and found the remaining pieces of the goodies I’d baked.  As we were sitting there enjoying our red wine, as well, I said…try dipping it in there.  She looked at me for a second, went ahead with the suggestion and never turned back.

IMG_2724

Many people equate biscotti with coffee, but find the right wine and the right flavor of treat to dunk and you have an amazing match!  At this point in the night we were on my local ‘Two (or three) Buck Chuck’ since I can’t get Trader Joe’s wine because I live in MD.  I get Pepperwood Grove (Pinot Noir for this circumstance) for $4.44 down the street at Rodman’s.  Love it!


IMG_2719

IMG_2722

I work on savory biscotti, as well, that pairs nicely with a variety of white wines.  Give them a try, dip & sip away!

Let’s Get Crack(er)in’

Pre-dinner, appetizers, crackers.  Go to store, reach for X box.  Get home, open cardboard then bag (or just rip open the bag of pita chips — don’t lie).  Why must we always do this?

I am crafting ideas for an event in a couple weeks and wanted to do a test pilot recipe for homemade super crisp crackers.  Did some googling and an Alton Brown recipe came up on Food TV‘s site.  How can you go wrong with Alton?  I used the basics and threw in some lemon zest and vodka to complement some of the fish I aim to serve the crackers with.

Ingredients
5 ounces whole-wheat flour
4 3/4 ounces all-purpose flour, plus additional for rolling
<used all whole wheat because I was out of regular!>
1/3 cup poppy seeds
1/3 cup sesame seeds
1 1/2 teaspoons table salt
1 1/2 teaspoons aluminum-free baking powder
3 tablespoons olive oil
6 1/2 ounces water
<used 1.5 ounces vodka and 5 ounces water>
added 1.5 teaspoons lemon zest
cracker2
I went with the awesome Penzey’s dry lemon peel for my zest that I wanted to add.   Add water, 15 minutes later, voila!
cracker1
Then, you just mix the dry ingredients, blend in the wet ones, knead a few times and break into 8 small balls of dough.
cracker3
You let them sit for 15 minutes then roll them out to desired thickness, based on what kind of cracker you’d like.
cracker4
Put the entire piece of dough in the oven.  You’re supposed to flip them half way but I love baking stuff on oven-proof racks to avoid the flipping need.  After 6-15 minutes, depending on what you choose (based on Alton’s specs), take the crisps out of the oven, let cool, then break into desired size of crackers.
cracker5
cracker6
The recipe (online) got rave reviews.  I think my effort to put my own flavor into it altered it a bit in an off way (the vodka made them a bit ‘soggy’) but they are still darn edible.  I just always love tweaking things.  But, give them a try!  Very easy to make and a fun alternative to store-bought crackers.

Beer-scotti

Yes, oh, yes.  You read it right.  Why stick with the norm?  I love making biscotti, but when opportunity knocks, find the bottle opener!  I have my monthly supper club tomorrow and the theme is Texas.  I was debating what to make and after some deep thought I remembered that a beer I love is right out of that state.  The name — Shiner Bock.  So (I feel like Alton Brown here), time to get to the lab.  I’d made one beer-scotti before, but it’d been awhile, so I had to get the juices (aka beer) flowing.

I started by combining 12oz of Shiner (1 bottle) and about 1 cup of dried cranberries in a pot on the stove to have the cranberries get nice and drunk.  Oh, sorry, absorb all the liquid.  I kept it at medium heat for about 20 or so minutes.

BeerScotti 001

BeerScotti 005

Once that was done, I let them cool for a bit (and sampled a few…very good!…keep away from children, unless you need them to fall asleep).

Next I was trying to decide what flavors to use as accents.  Do I want this to be savory or sweet?  I chose to do a bit of both.  I opted for rosemary and cinnamon.  So, here I go with all these ingredients, and of the the staples of my normal recipe…

Flour, sugar, baking powder & soda, salt, cinnamon, rosemary, egg yolk, vanilla, (more) Shiner, drunk cranberries, walnuts.

BeerScotti 014

Dough ready, make it into two logs, throw it into the over at 375 degrees for 25-30 minutes.

BeerScotti 011

When the first part is done, take it out and slice it.  I use a pizza cutter.  Makes it so easy.  Samples required at this point.  WOW!  WOW!   For the second baking, I just turn the oven off and throw it back in there. I don’t time it, I know it will work perfectly because I’m not picky on the crunchiness, softness, etc. of the biscotti.  If you are wondering, the recipe called for 10 minutes at 325 degrees.

BeerScotti 012

I am so excited to take this to supper club tomorrow.  So, to summarize…pass me another.  Make that a biscotti this time.


Baking…1,2,3…Biscotti

It’s Friday, it’s pouring rain, what better a thing to do before dinner than bake?  You have to have dessert, right?  And it helps to prep for a party tomorrow.

One of my favorite things to bake is biscotti because it has (or truly doesn’t have to have) butter, which means those who are lactose intolerant can totally enjoy it!  And, it keeps for awhile.  The crispier, the better!!  With the recipe I use, I take the basics and alter the flavors.  Tonight, I was looking around my kitchen and opted to include dark chocolate (duh!), whiskey and walnuts.  There is a health benefit in all of those, in some way, shape or form.


Pic 001The aforementioned recipe I use is from a cookbook I received years ago.  You just combine:
-2+ c flour
-3/4 c sugar
-1/2 tsp baking powder
-1/2 tsp baking soda
-1/2 tsp salt
-1 tsp cinnamon
-most times I also use 1 tsp nutmeg

Blend. Then add:
-1 egg
-1 tsp vanilla

Those are the basics.  Then you just need more liquid that is flavor and other dry ingredients for flavor, from nuts to chocolates to dry fruit to more spices  You might also need some water sometimes just for that extra bit of liquid.

So for this recipe I used:
-‘some’ whiskey
-about 1/2 cup chocolate chips
-about 3/4 cup – 1 cup walnuts


Pic 002


Once the dough is mixed, you make it into flat ‘logs’ — I can’t think of a better word — and bake it for 30 minutes at 375.


Pic 005

After half an hour, take it out and cut it into ‘biscotti’ shape.  And you know, these crumbs fall off– MUST sample.  They have no calories, come on.  Then, contrary to what the recipe said, I just turn the oven off, put the cookie sheet back in there, with the cut biscotti on it and let it sit in there, be it 1 hour or overnight.  Again, the crispier the better.


Pic 007Final product, perfect!